Key Takeaways
- Surface preparation is the foundation for powder coating adhesion, appearance, and service life.
- Every part should be inspected for rust, contamination, sharp edges, hidden cavities, and areas that require masking.
- Cleaning, stripping, blasting, and profiling should match the metal type and the part’s condition.
- Correct curing and final inspection are essential steps, not afterthoughts.
- Parts exposed to outdoor conditions in Utah may require closer attention to edges, seams, and corrosion-prone areas.
From driveway gates and trailer frames to patio furniture and shop-built railings, powder coating steel in Utah requires careful preparation long before any part enters the spray booth. Utah metalwork can face dry dust, intense sun, winter moisture, and road deicing residue, so the quality of the surface beneath the finish matters as much as the color on top.
A durable finish starts with clean, sound, dry metal. Rust, oil, old paint, mill scale, welding residue, and moisture can interrupt adhesion, leaving a coating more vulnerable to peeling, bubbling, chips, or corrosion.
Why Surface Preparation Comes First
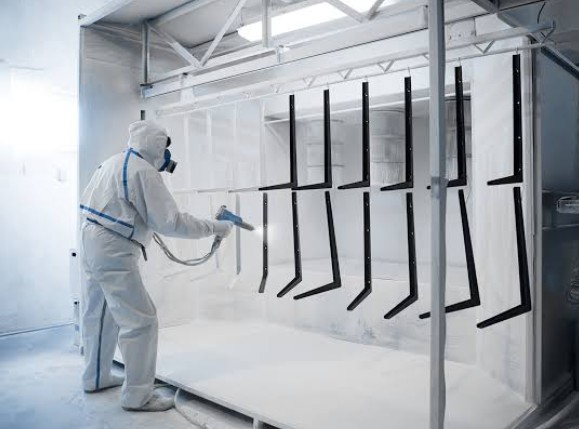
Powder coating can produce an attractive, protective finish, but it cannot repair a weak foundation. The basic powder coating process involves applying dry powder to a prepared surface and curing it into a continuous film. If contaminants remain on the metal, the powder may bond to the contaminants rather than the substrate.
Preparation removes barriers between the metal and the coating. It also creates a consistent surface that helps the finish cover evenly, especially around corners, welds, and complex shapes. A part that looks clean at a glance may still carry invisible oils, salts, or fingerprints that affect the result.
Step One: Inspect the Metal
Inspect the part before cleaning begins. Look for rust, pitting, dents, cracks, old paint, plating, adhesive, grease, mill scale, weld spatter, and crevices that could trap moisture. Identify whether the part is steel, aluminum, galvanized metal, or a mixed-metal assembly.
Also mark threads, hinges, bearing surfaces, inserts, grounding points, and mating areas that must remain uncoated. Removing or masking hardware before finishing is usually more reliable than trying to clean coating from it afterward.
Step Two: Remove Contaminants
Degreasing removes oils, lubricants, and shop residue. Washing and rinsing remove dirt and cleaner residue, while thorough drying helps prevent moisture from being sealed beneath the coating. After cleaning, handle the part with clean gloves and keep it off dirty benches, cardboard, or oily racks.
Contamination can return quickly. A bare handprint, a silicone-based product, a cutting fluid, or residue from an earlier repair can be enough to cause a localized adhesion issue. Clean handling should continue from preparation through coating.
Step Three: Remove Rust, Scale, and Old Coatings
The right removal method depends on the part’s material, shape, thickness, and condition. Abrasive blasting is often used to remove corrosion, mill scale, and failing coatings. Mechanical sanding can work well for small repairs, edges, and localized defects. Chemical stripping may be appropriate where aggressive abrasion could damage delicate parts.
Blasting should be performed with appropriate containment, ventilation, protective equipment, and operating practices, as abrasive blasting can generate hazardous dust. It is not simply a cosmetic cleaning step, particularly when old coatings or unknown materials are being removed.
Step Four: Create the Right Surface Profile
Surface profile is the fine texture left behind after preparation. It gives the coating more area to grip, but it must fit the intended powder system and desired appearance. A surface that is too smooth may reduce mechanical hold. An overly rough surface can show through the finish, complicate coverage, or require more coating to level out.
Abrasive choice, air pressure, blasting distance, dwell time, and operator technique all affect the profile. Thin sheet metal needs particular care because excessive blasting force or heat can distort it.
Different Metals Need Different Preparation
- Steel: Remove corrosion and scale, then clean and dry the surface before coating.
- Aluminum: Clean thoroughly and prepare promptly, as the surface oxide layer reforms quickly.
- Galvanized metal: Requires a process suited to the zinc-coated surface to ensure the finish adheres properly.
- Previously coated parts: Assess whether the old finish is sound enough for preparation and recoating, or whether complete removal is needed.
- Mixed-metal assemblies: Deserve extra attention at joints, seams, and contact points where corrosion or incompatible materials may create problems.
Welds, Edges, Holes, and Hidden Areas
Failures often start at overlooked details. Weld spatter can interfere with appearance and coverage. Sharp edges may receive a thinner film than broad, flat faces. Open holes, enclosed sections, and seams can retain blasting media, oil, cleaning solution, or moisture.
Detail-Work Checklist
- Remove weld spatter and loose scale.
- Round sharp edges where the design allows.
- Clean holes, corners, and tight seams.
- Check cavities for trapped moisture or debris.
- Mask threads, mounting faces, and connection points as needed.
Why Curing Matters as Much as Cleaning
Even excellent preparation cannot compensate for an incorrect cure. The coating must reach the powder manufacturer’s specified cure conditions at the part itself, not merely in the oven air. Thick steel components often take longer to reach the same temperature as thin brackets or panels.
Under-curing can leave the finish less developed than intended. Excessive heat exposure can affect color, gloss, or flexibility. Follow the powder supplier’s technical instructions and use a process that accounts for part mass, oven performance, and coating type.
Common Causes of Powder Coating Failure
- Peeling: Often associated with contamination, poor surface preparation, or inadequate adhesion.
- Bubbling and pinholes: Can result from moisture, contamination, surface porosity, or gases escaping from the substrate during heating.
- Uneven texture: May relate to film thickness, application settings, surface condition, or cure control.
- Rust beneath the finish: May begin where corrosion was not fully removed or where edges and damage expose the metal.
- Color variation: Can be linked to inconsistent curing or unsuitable powder storage and handling.
How to Prepare a Part Before Sending It Out
- Remove rubber, plastic, loose hardware, and heat-sensitive components.
- Tell the finisher what the part is made of and how it will be used.
- Identify areas that must remain bare for assembly or electrical contact.
- Share any history of oils, chemicals, old paint, or prior repairs.
- Ask whether stripping, blasting, masking, or weld cleanup is needed.
- Confirm the desired color, texture, gloss level, and service environment.
Final Inspection Checklist
Inspect the completed part under good lighting. Check for missed areas, thin coverage, dirt, bubbles, pinholes, uneven texture, and damage around corners, welds, holes, and masked sections. Confirm that threads remain usable and that hinges, latches, and other moving parts still operate correctly.
Conclusion
A long-lasting powder-coated finish begins before powder is applied. For Utah steel projects, careful inspection, contaminant removal, appropriate rust treatment, controlled surface profiling, detail work, proper curing, and final inspection all contribute to a finish that is better prepared for everyday use and changing outdoor conditions.
